The goal here on this is to restore the complete database back to a certain point in time for users to query the data on that date in time.
I use Datto for backing up the servers. Datto is awesome because it backups a full image of the server, then takes the image and starts a virtual image of it and runs checks for it’s health including emailing me a screenshot of the booted console. It also streams off the backup to the cloud in case of a local disaster that the onsite appliance is damaged or can not be used. In this offsite image it can be virtualized and run from the cloud datacenter until the local system can be restored and brought back online. This gives me 2 options.
- Recovery from a failed system within a few minutes by bringing online the failed server on the local appliance.
- Recover from a site, network, or datto disaster like flood or fire to the datto cloud and connect to it using a vpn tunnel over the internet.
Datto partners with Kroll to provide tools to restore down to a sql table at a time, but for this blog I will restore a complete database as the process is different.
The first step of course would be to logon to the onsite Datto siris appliance. If you are unsure of the ip address to connect go to device.dattobackup.com and it will search and bring back any on premise appliances.
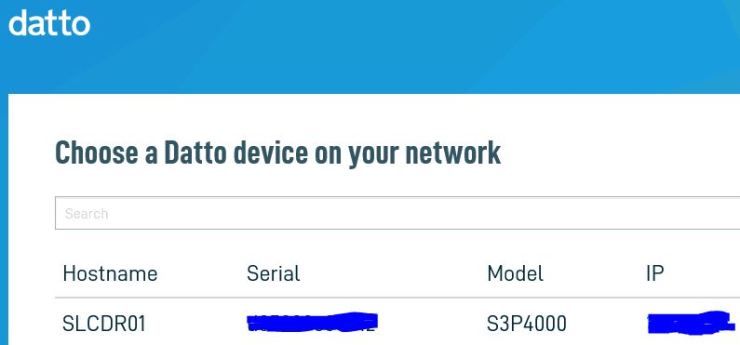
Click on the hostname, and Logon

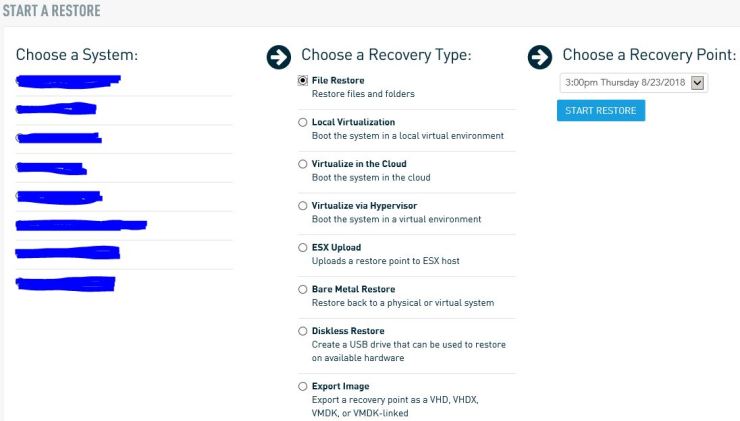
This brings you to the overview page, click on Restore
What we are here to do is a database restore, but we’re restoring the database files.
- choose the system that the database was backed up from
- choose file restore
- choose the restore date and time and click Start Restore
Now you will see that a recovery point is available, you need to mount it

click Mount
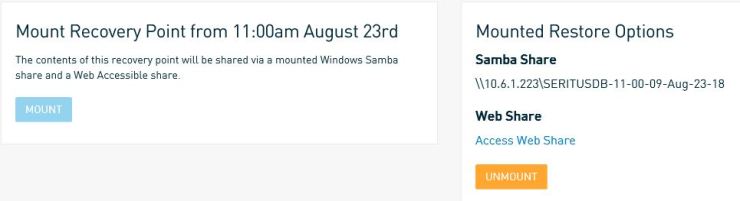
You can see there are 2 ways to access the mounted restore files,
- Samba Share
- Web share
In this example I will choose Web Share where I will click the link “Access Web Share”
This puts me in a web browser to drill down the folders and files that can be restored.
It’s important to know where the databases are stored before trying to restore them. In my case they are in
C:\Program Files\Microsoft SQL Server\MSSQL10_50.MSSQLSERVER\MSSQL\DATA folder so I need to browse to that point and then choose the files I want to download. I will need both the MDF and LDF files.
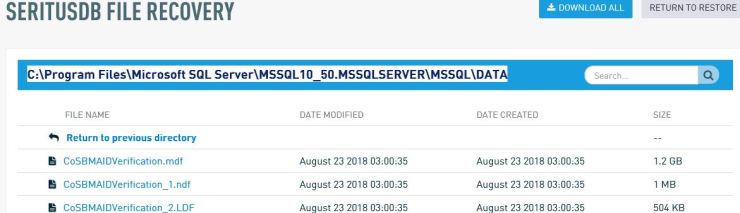
Select the files to download one at a time and you will see the file download option at the bottom of the browser

Click Save As and put the file in an easy place to use it, possibly back into the source directory on the server. if you choose this path rename the file before saving it there to avoid overwriting the original.
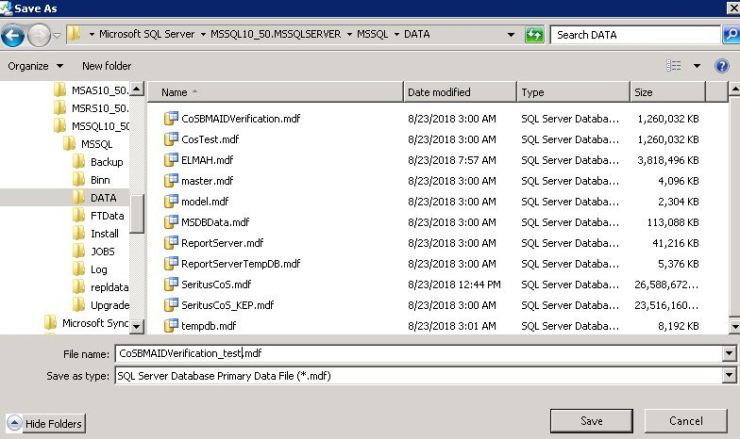
notice how I changed slightly the name of the file by appending _test to it before mdf
I will do the same for the ldf file.
Attaching the restored Database files
First open Microsoft SQL Server Management Studio
Connect to the databases

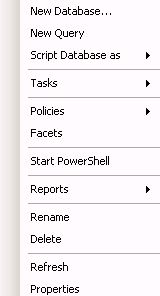
Now right click on Databases node an select attach
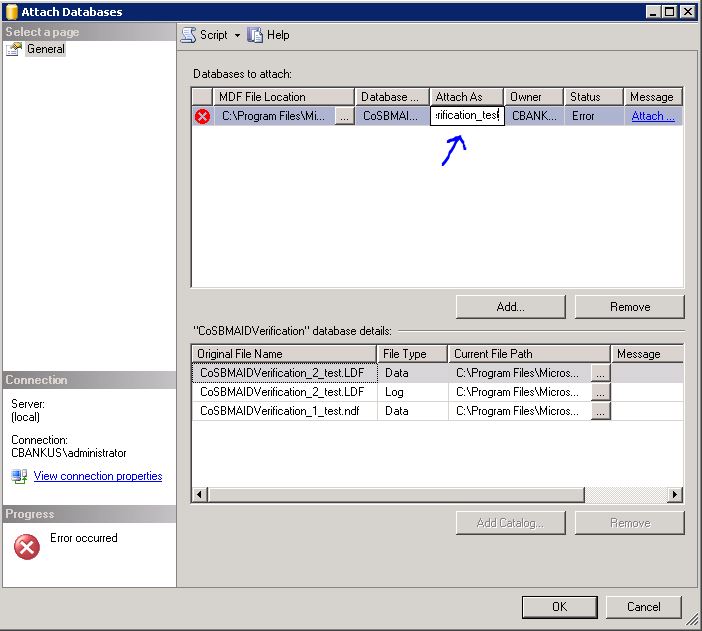
Click in and select the database files you restored.
- Select file of the database to attach by clicking on the ellipsis points.
- At the top next to Databases click in attach as field and rename. In this case I’m appending the file name with _test
- Make sure you include the files at the bottom also. they will show up back to the original name of the production database, make sure you select the renamed, restored files to avoid any corruption.
Click OK
You will now see the new database included in SQL Server Management Studio
Removing restored database
Once you are done with any testing and are ready to remove the database to save on space and clutter
- Open Databases in SQL Server Studio
- Select the database to delete
- Right click on the database name and choose delete

after verifying the database name, check at the bottom, “Delete backup and restore history information for databases”
Click OK
This procedure should work from other image backup systems for restoring a complete SQL Server.
