Purpose and Scope
- Test the ability to restore a VM running on XenServer to Nutanix
Preparation Phase
- Determine VM Server Name
- Determine VM IP Address
- Determine Operating System
- Determine Roles
- Download the Datto Utilities ISO from downloads.datto.com
- In Nutanix Prism open Image Configuration and upload the image
- Give it a Name,
- Image Type: ISO
- Storage Container:
- Upload a file – upload the downloaded iso
Implementation Phase
- In Nutanix Prism go to VM and tables
- Click on Create VM
- Type Name of VM to be restored and give its description
- Choose CPU’s and Cores to match the failed source VM
- Choose Amount of Memory
- Add new disk and make it the same size or larger than the failed source VM
- on the CD-Rom mount the ISO we created in Step 5 in preparation phase
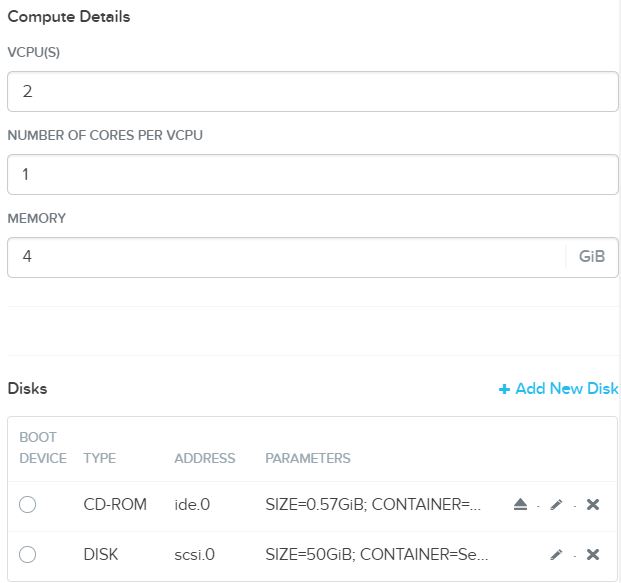
- Add Network Adapter
- Select CD-ROM as the boot device, click save
- Power On
Restore Phase
- Highlight the VM in Nutanix Prism
- Click on Launch Console
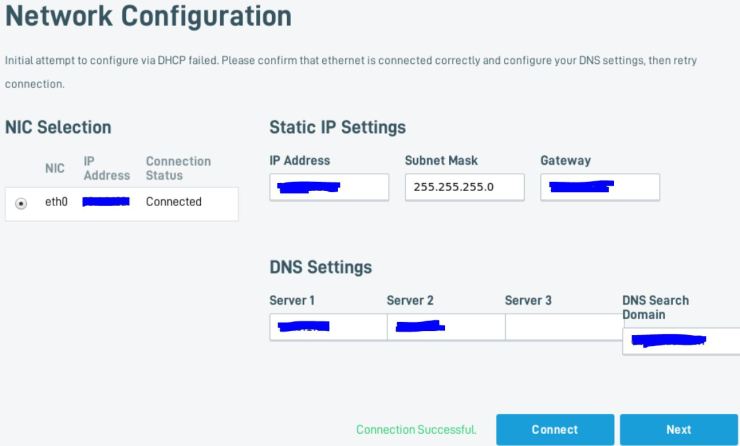
- Verify Network Configuration, click Connect, then click Next
- Click Continue without update
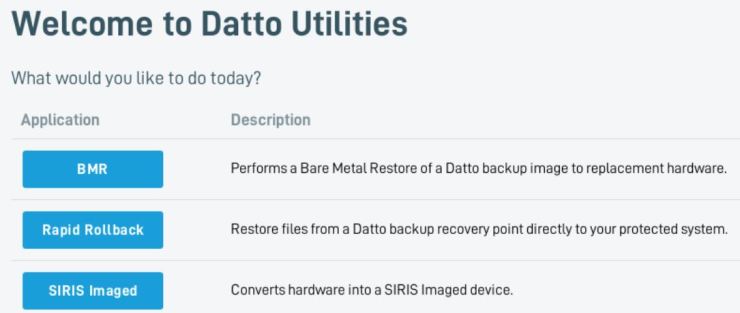
- Click on BMR
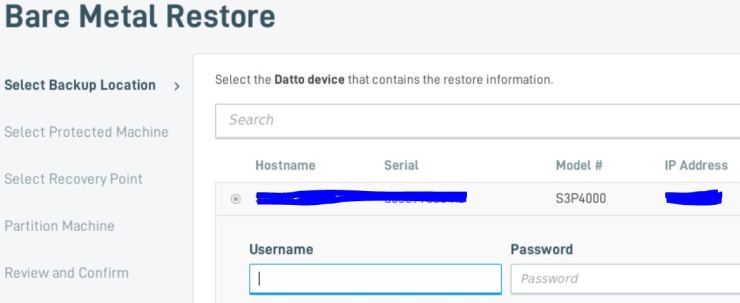
- Select Datto Device
- Enter username and password, click Next
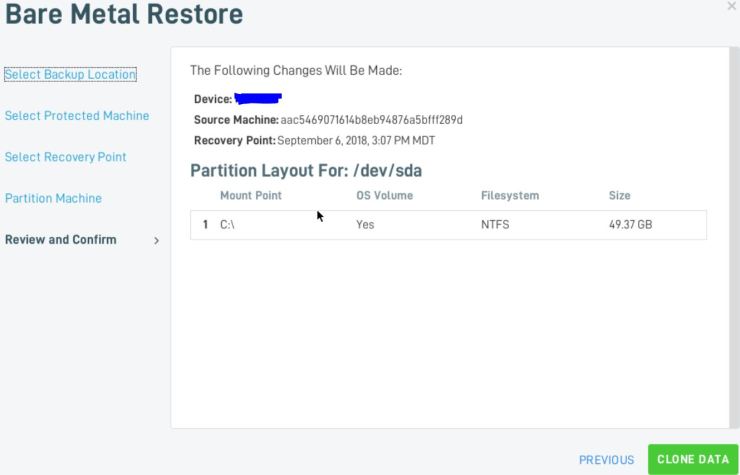
- on Select Protected Machine, select the server to restore, click Next
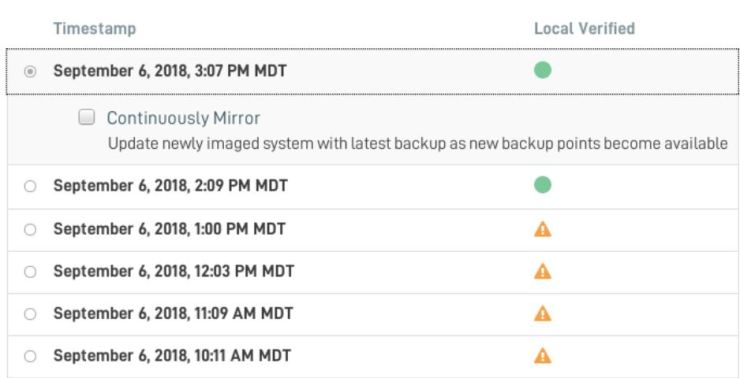
- on Recovery Point choose the latest that is been locally verified. Click Next
- On Partition Machine option, choose Automatic Partition, click Next
- Click Clone Data
- It will ask if you are sure, type in FORMAT to format and partition the drive

- Watch the progress as it moved from partitioning, formatting and transferring data.

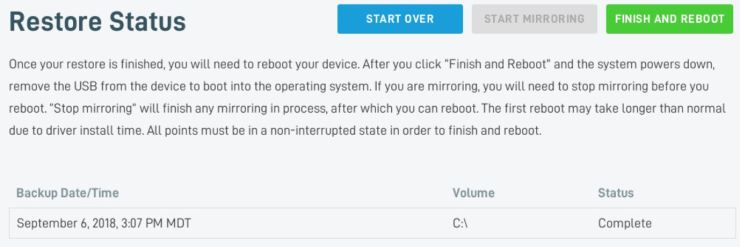
- Click Finish and Reboot
- After VM is booted, logon and change the IP Address to it’s static address as it will start with DHCP
- It’s now restored and back in production.
