Preparation:
You must first have established an aws account and have a basic environment with an EC2 Virtual Machine. This document assumes you have created this already.
You will need need to configure a VPC
First we need to obtain the Citrix Netscaler – Do this by opening the AWS Management Console and going to Compute\EC2.

Click on Launch Instance and in the search field type Citrix ADC Gateway and highlight AWS Marketplace, Enter
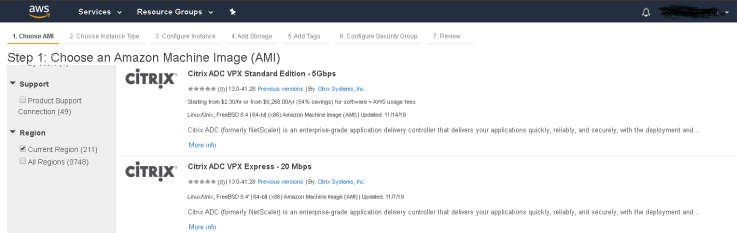
Select Citrix ADC VPX version you need. I’m choosing Citrix Networking VPX – Customer Licensed. – Click Select

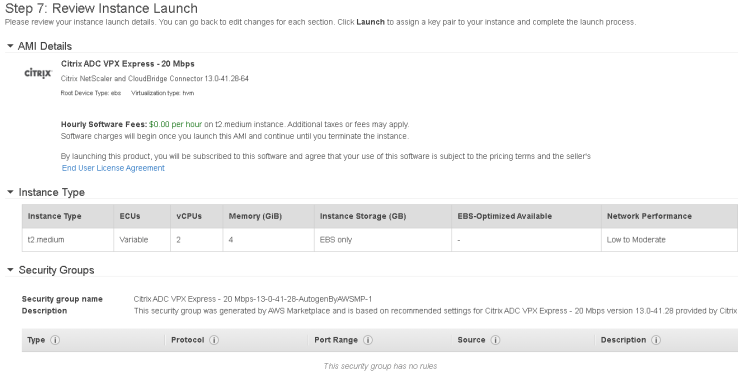
Click Continue. I recommend choosing t2.medium to get enough cpu and memory to run properly. Select and then choose Configure Instance.
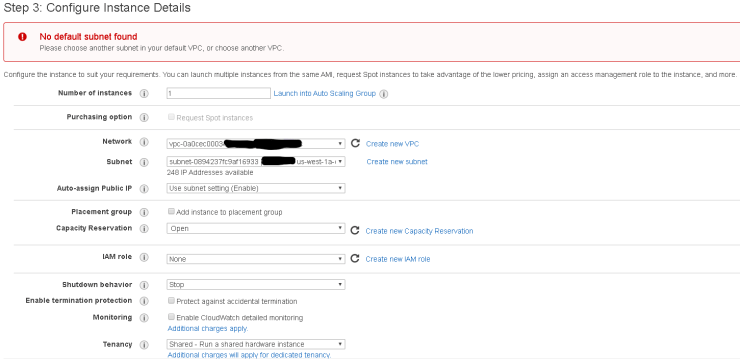
You need to select a vpc (Virtual Private Cloud) configured during aws preparation and Choose the subnet. Choose the Subnet that will be for your SNIP (three subnets eventually have to be configured for NSIP, SNIP, and VIP/Gateway)
I also recommend selecting “Protect against accidental termination”
Add or configure Security Group. Make sure to allow tcp ports 22, 80, 443, 3008-3011, 4001, 67, 123, 161, 500, 4500, 3003
Click Review and Launch
Navigate to NETWORK & SECURITY > Network Interfaces and click Create Network Interface.
Add a description and then select a subnet. This subnet is utilized for your SNIP so it should be placed on a subnet in the internal network. Also, choose the security group crated in the previous step. Click Yes, Create
Add an additional Network Interface. This is a Public facing subnet for your Gateway/LB VIP. Create a description and choose the security group configured above.
avigate back to Instances and select your Citrix ADC. To add the Network Interfaces to the Citrix ADC, the instance has to be stopped. In the Actions list, select Instance State and then click Stop.
Again click the Actions button and navigate down to Networking and Attach Networking Interface.
The NSIP interface is already attached to the VM, the next interface to be added should be the LB-VIP, followed by adding the server/internal interface for the SNIP. Once the Network Interfaces are attached, the instance can be Started.
Configure a new Elastic IP and associate it with your NSIP interface.
Note: you can’t provision this in the free usage tier and will get, a message
Click Launch
Here you will need the key Pair you created when you setup your environment or create a new pair. These keys are important to keep safe and keep. You will be locked out of your environment if you lose them.
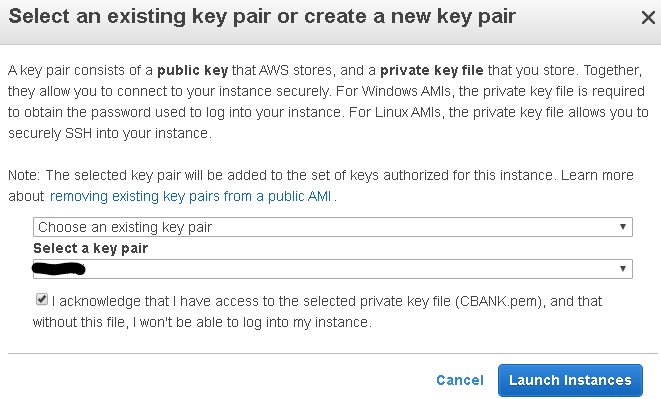
After choosing key pair, click Launch Instances
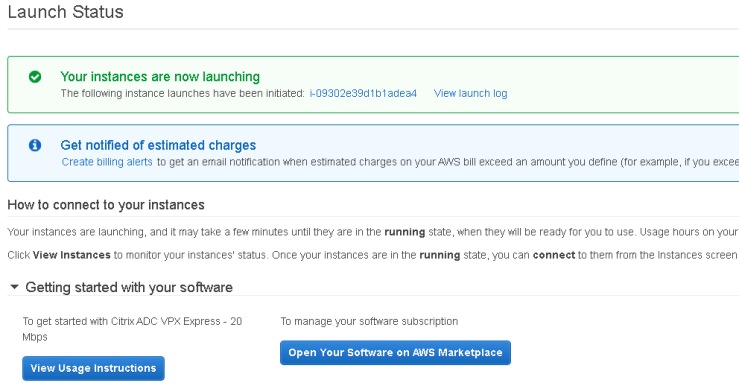
There is some valuable information on this screen.
first click the view launch log to see if it’s finished
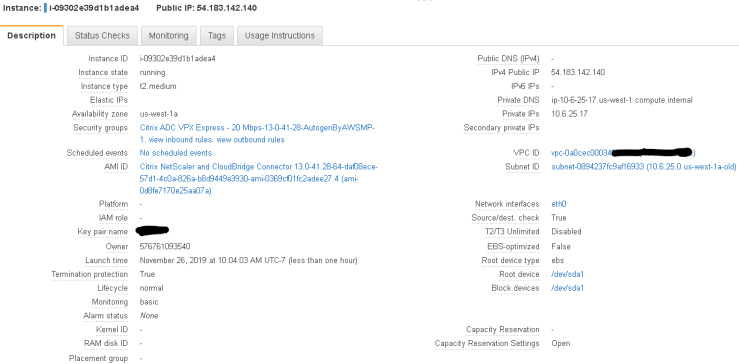
Second click on the instance id. It’s the super long number to the left of the View launch log link. This will open up your instance. show you it’s status

You see the IPv4 Public IP address. Note that this one will change each time this is powered off or rebooted. You will want an elastic IP to put this into production
Under the Description tab below you will see lots of valuable information that might need to be modified, but it’s great reference. Including the internal IP Address which is needed to connect and configure.
Now we want to connect to it. To manage the Citrix ADC we can either manage it from CLI SSH or GUI. I will show you how to connect both ways.
- GUI. You will need to manage it from the a browser. open http://54.183.142.140/ User Name is nsroot and the password is the instance id:

- Click Logon
- You first are presented with a configuration wizard

- Next click on Subnet IP Address to configure that. I like to use another IP next to the ADC IP address which is 10.6.25.17, so I’ll make the SNIP address 10.6.25.18
- Next click on Host Name, DNS IP Address, Time Zone and NTP Server. You can make the hostname whatever you want, just note your license will need to match
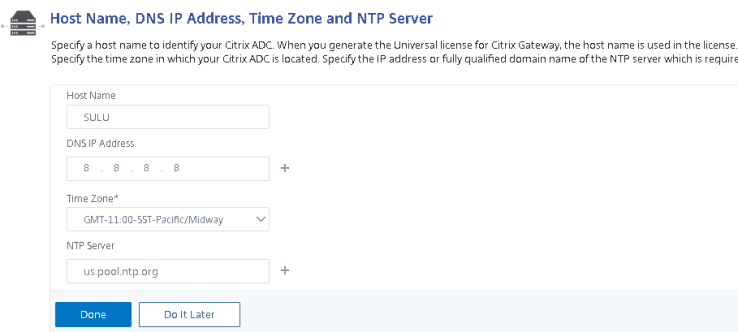
- Once completed, click Done – I got a file does not exist error at top, so I had to click Do it later to continue
- license host is: 01291b1adea4
- Go to Citrix.com and licensing to get a valid gateway license
- Add licenses, reboot
Alternatively you can connect with cli using an ssh client like putty
- Install Putty
- Convert your private key using PuTTYgen
- Open PuTTYgen
- Type of key to generate: select RSA
- click Load and select the .pem file

- Click OK
- Enter a passphrase and confirm it, click Generate
- Safe the key pair as a .ppk file – click Save Private Key
- Now to connect
- Open Putty
- in the category pane, choose session and complete the following fields
- in the Host Name enter nsroot@54.183.142.140
- Under Category Connection, SSH, Auth – Browse and select the .ppk file just generated
- Click back on Session and Save the configuration.
- Click Open and you’ll be prompted to cache the host key in registry, click yes
- next the putty cli will open prompting you for the password, enter it and you’re on your way to entering the commands.
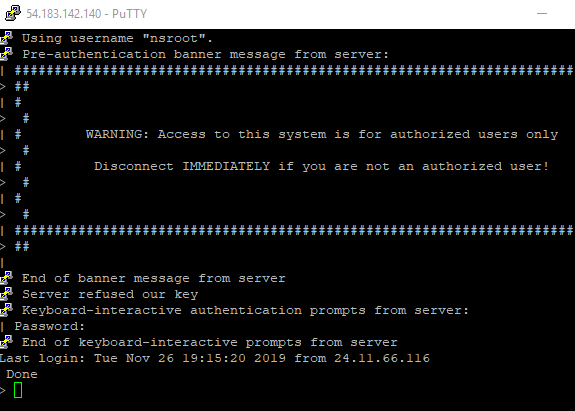
- done

1 thought on “Setup Citrix ADC in Amazon Web Services AWS”