It’s great to have virtual servers in the AWS cloud, but how do your end users access them. In this blog I will be adding a Citrix Gateway to the VPC (Virtual Private Cloud) so I can configure access to access resources in the VPC
Prerequisites
- Add a Citrix ADC to your VPC environment in AWS – see Setup Citrix ADC in Amazon Web Services AWS
- Have resources in your VPC to access such as Citrix Virtual App Servers, Storefront Servers, Databases and other resources to connect to.
- Allocate Subnet IP and Virtual IP for the gateway. Add 2 additional network interfaces for separate subnets.
- increase user timeout as to not get dropped in the middle of these processes.
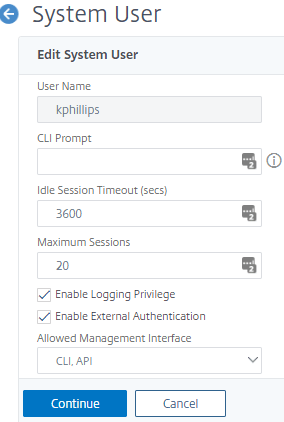
- Click Continue then save for specific user. Click Done
- Note: this cannot be done to nsroot so create a new user and increase that timeout
- Configure modes: In Citrix ADC go to System, Setting, Configure Modes like this.

- Click OK
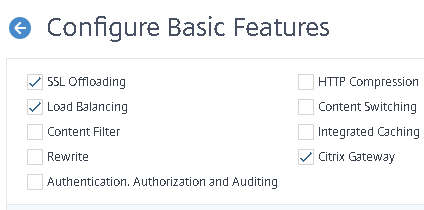
- Click Configure Basic Features
- Click OK
Create SSL Certificate for the gateway
- Open Traffic Management. SSL, SSL Files
- First we will create an RSA key – click RSA key

- Compete the fields and click Create
- Next we will create the CSR
- Click on CSR Tab and click on Create Certificate Signing Request (CSR)

- Once completing the fields click Create
- Now we want to create the certificate using a CA. In this example I have purchased a comodo certificate through Namecheap.com
- Open another browser tab and logon to the ADC and browse to Traffic Management\SSL

- Under tools click on Manage Certificates / Keys / CSR’s
- Browse and view the CSR file aws-test-2019
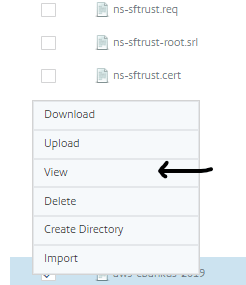
- Click View and view the file

- Now on namecheap.com logged in after purchasing the certificate click manage.
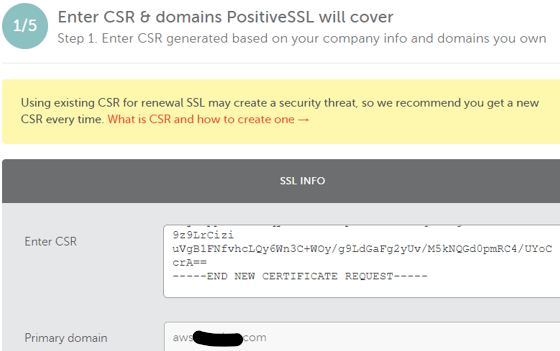
- Copy and paste into certificate request
- Click Next
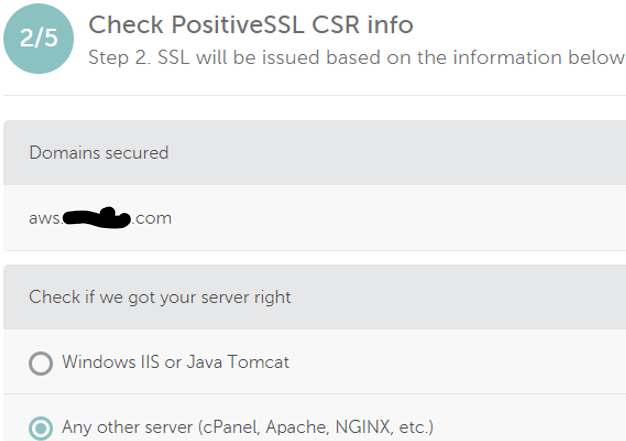
- Select Apache option, click next
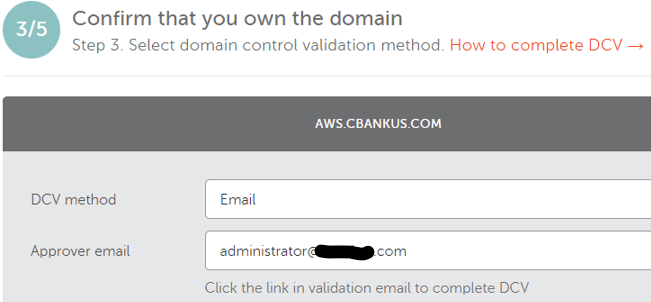
- Choose approver email, click next
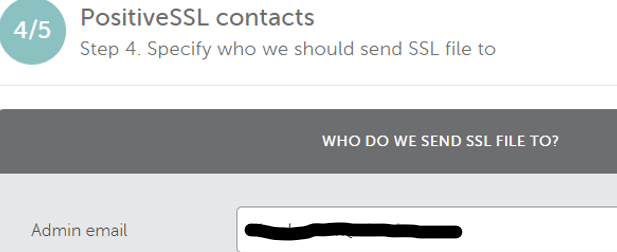
- Add Admin email, click Next
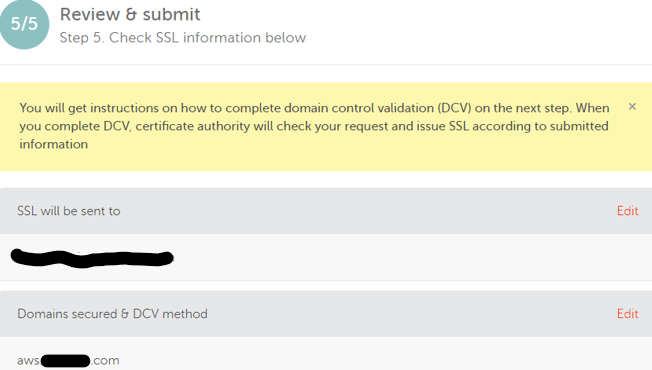
- Review the approver and receiver email address, click Submit
- Check the approver email address. You will get an email with a link to click to approve. Once you have approved the receiver email address will receive the certificate in a few moments.
- Download the certificate file and unzip
- Upload into ADC using Manage Certificates / Keys / CSR’s tool.
- Click Upload and browse to the unzipped location.
- Upload both the certificate and the CA-Bundle files.
Creating a Certificate-Key Pair
- To create certificate-key pair, complete the following procedure:
- Log in to the NetScaler appliance by using the nsroot credentials.
- Expand Traffic Management – SSL
- Select Certificate , then Server Certificates
- On the Server Certificates page, click install.
- In the Certificate-Key Pair Name field, specify the certificate-key pair name.
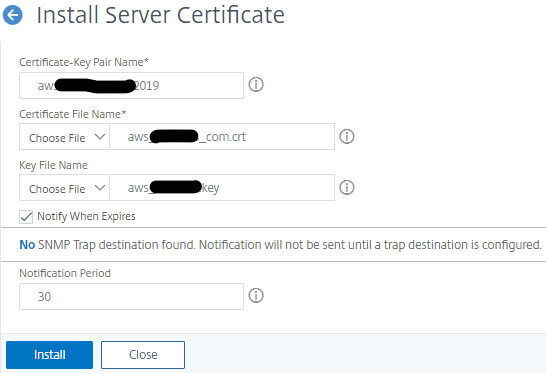
- Complete the form by browsing for Certificate and key files, click Install
Create the CA Intermediary Bundle
- Click Install

- Complete by giving the intermediary cert a name
- browse the intermediary file. Notice that you don’t choose a key file
- click Install
Link Certificate
- Now we need to link the certificate to the Intermediate Bundle
- In SSL \ Server Certificates view, check aws.test.com.2019
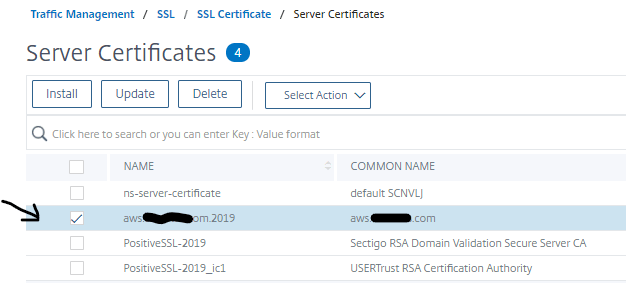
- Select Action drop down and select Link, then choose certificate to link
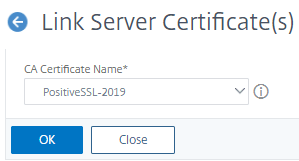
- Select PositiveSSL-2019 and Click OK
- Save configuration

Configure Citrix Gateway
- Enable Citrix Gateway
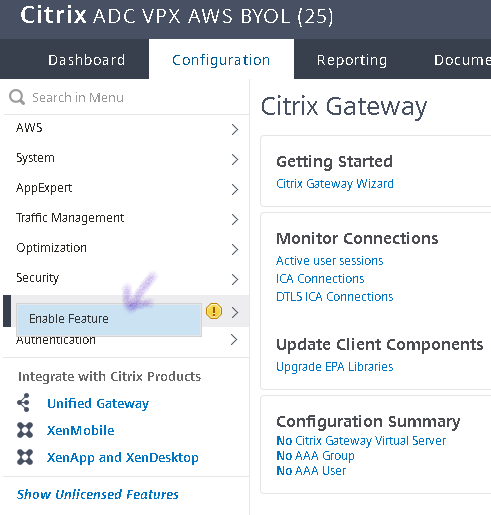
- Right Click Citrix Gateway, click on Enable Feature
- Open Citrix Gateway and click on Virtual Servers
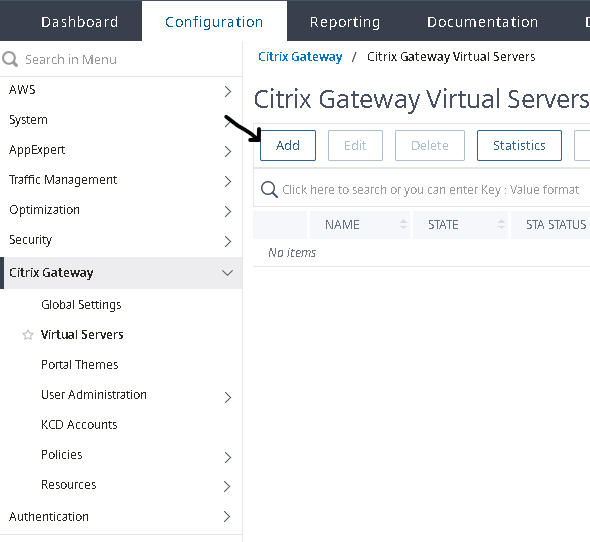
- Click Add to start configuring
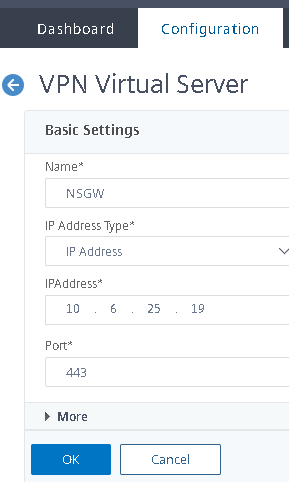
- Give it a name and an IP address, click OK

- Click Continue
- Under Basic Authentication click the +
- We’re just going to choose LOCAL for the policy on here instead of LDAP as we don’t have an Active Directory Server in the environment. We will create local accounts for access later.
- Click Continue
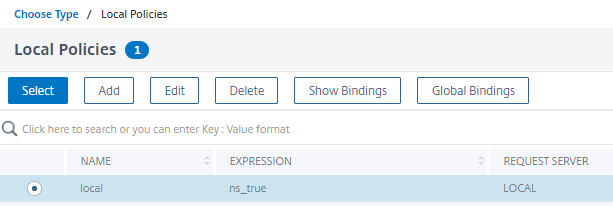
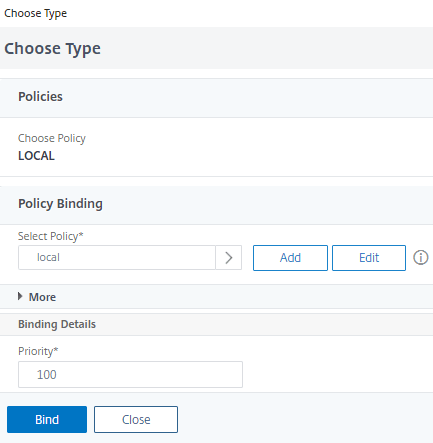
- name local policy “local” and add the expression as ns_true, Bind
- Click Continue, Click Done
- Open Citrix Gateway and click on Virtual Servers
- Add Profile and Policies
- go to Session Policies to add the Policies and Profiles
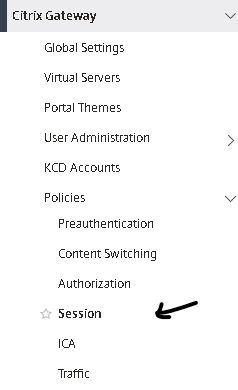
- Click on Session, then to the right click on Session Profiles Tab
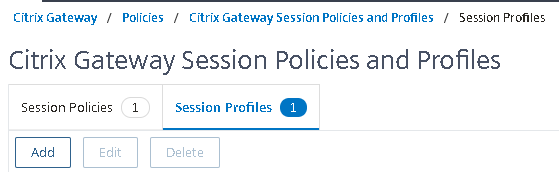
- Click Add to create a Windows Session Profile
- First click on Client Experience Tab

- Configure like this
- Click on Published Applications Tab
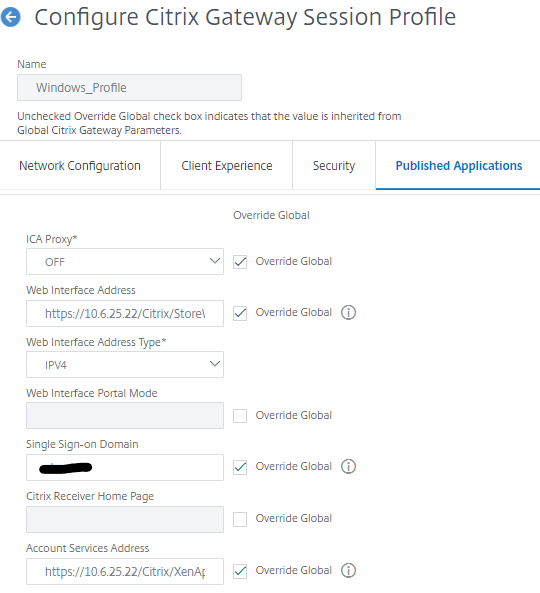
- Configure like this, Using an ip address for the storefront server built.
- Scroll down to the bottom and click the + by Policies

- First create a session policy
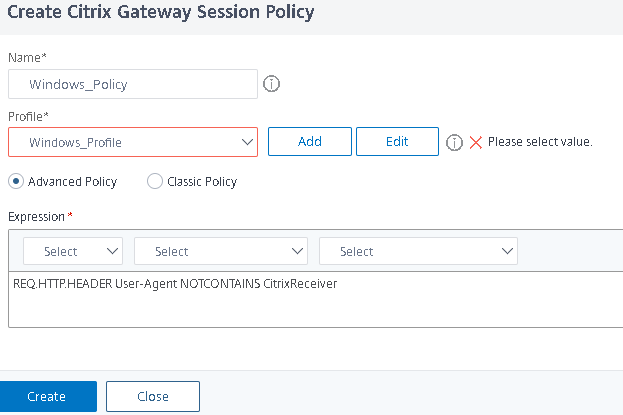
- The policy itself if straight forward, but the order is difficult to document. In order to configure the Policy, you have to attach a profile which we have not yet created. I added a blank profile and gave it the name Windows_Profile. We will configure it later.
- Click Bind
- Click Done
- Edit
- go to Session Policies to add the Policies and Profiles
Configure the Gateway with the policies and certificate
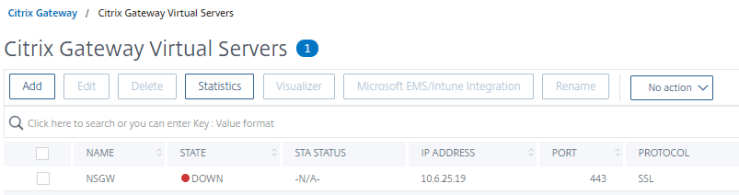
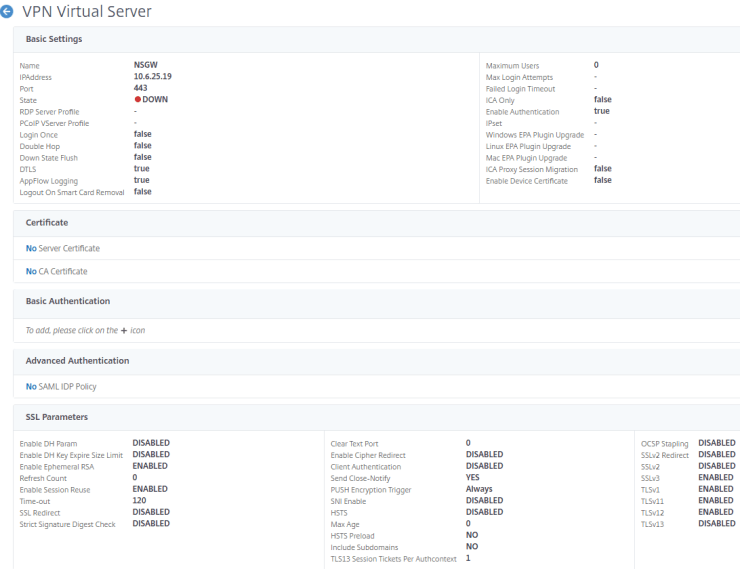
- Note that the State is down. This is because we have not connected the policies and the certificates yet. This is what we will do now.
- Check the box next to NSGW and click Edit
- First click on No Server Certificate
- Browse and select the certificate we created above.
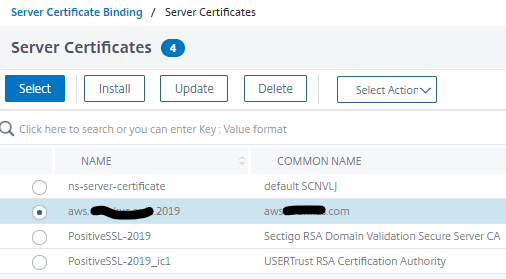
- Click the blue Select button to link it
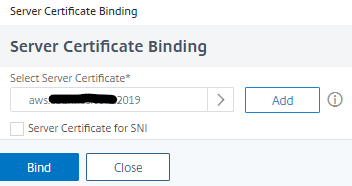
- now click Bind
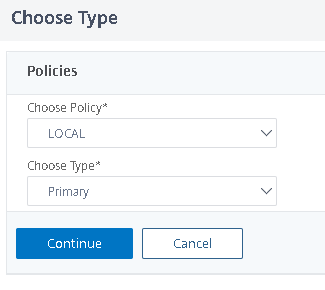
- Back at the Virtual Server we will now click + below Basic Authentication to add the local authentication policy we created.
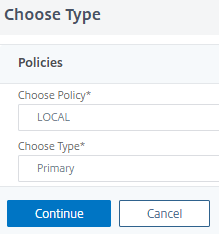
- choose LOCAL policy and Primary as type
- Click Continue

- Now we will click to select
- Select local and click the blue Select button
- Now click Bind
- now scroll down to policies section. Click No Session Policy
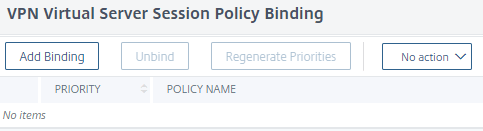
- click Add Binding
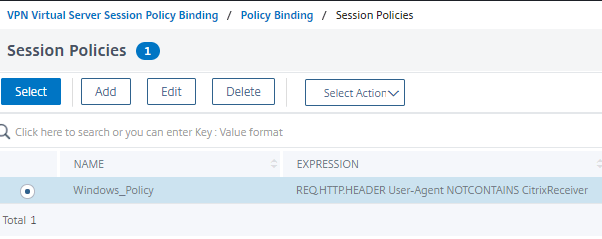
- Click Select then click Bind

- Notice that the Profile we created previously and bound do the policy is linked
- Click Close
- You will now see 1 Session Policy
- Click Done
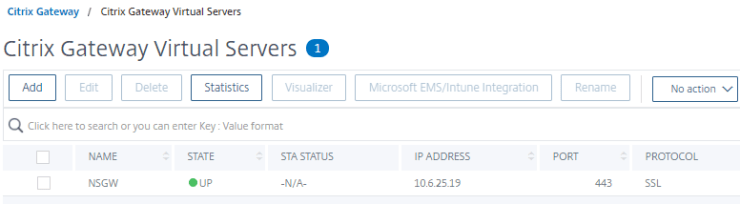
- Notice that the State is now UP
- we’re close to testing, but first we need to configure DNS
- Salve the configuration
- I’ll go to Network Solutions to create an a record to match the IP address and the name of the certificate.
- Since this could ta
